-
Login to your server using ssh
-
Install the Nginx Web Server
$ sudo su
$ apt-get update
$ apt-get install nginx
-
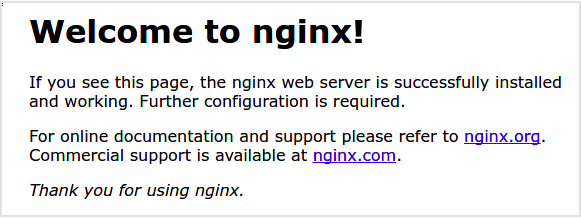
Access your domain/ipaddress and you see like this
-
Check and configure firewall rulle
$ ufw status
$ ufw allow ‘Nginx Full’
$ ufw allow ‘Nginx HTTP’
5.Install mysql & mysql server
$ apt install mysql-server
$ mysql
mysql> SELECT user, authentication_string,plugin,host FROM mysql.user;
mysql> ALTER USER ‘root’@’localhost’ IDENTIFIED WITH mysql_native_password BY ‘your-desired-password’;
mysql> FLUSH PRIVILEGES;
mysql> exit
- Install PHP including some extensions
$ sudo apt install -y php7.4 libapache2-mod-php7.4 php7.4-common php7.4-gd php7.4-mysql php7.4-imap php7.4-cli php7.4-cgi php-imagick php7.4-curl php7.4-intl php-memcache php-memcached php-psr php7.4-pspell php7.4-snmp php7.4-sqlite3 php7.4-tidy php7.4-xmlrpc php7.4-xsl php7.4-mbstring php7.4-fpm
- Configure the PHP Processor
$ vim /etc/php/7.4/fpm/php.ini
- Find / uncommenting the line ‘cgi.fix_pathinfo’, setting the value to “0” like this:
cgi.fix_pathinfo=0 - Restart PHP
$ systemctl restart php7.4-fpm
- Configure Nginx to Use the PHP Processor
- Go to /etc/nginx/sites-available/
- Duplicate the ‘default’ file using ‘cp’ command
$ cp default domain.com
- Edit the duplicated file, but you can set the filename whatever you want, in my case, i use ‘domain.com’
$ vim domain.com
upstream php {
server 127.0.0.1:9000;
}
server {
include mime.types;
default_type application/octet-stream;
server_name domain.com www.domain.com;
root /path/to/project-root/public;
index index.php;
location ~ .php$ {
#NOTE: You should have “cgi.fix_pathinfo = 0;” in php.ini
include fastcgi_params;
fastcgi_intercept_errors on;
fastcgi_pass unix:/run/php/php7.4-fpm.sock;
fastcgi_param SCRIPT_FILENAME $document_root$fastcgi_script_name;
}
location ~ /.ht {
deny all;
}
location / {
if (-f $realpath_root/maintenance-sentinel) { return 503; }
try_files $uri /index.php?$query_string;
}
location ~ /.(htaccess|method)$ {
return 403;
}
location ~ ^/assets/.protected/ {
return 403;
}
location ~ ^/assets/.*.(?i:css|js|ace|arc|arj|asf|au|avi|bmp|bz2|cab|cda|csv|dmg|doc|docx|dotx|flv|gif|gpx|gz|hqx|ico|jpeg|jpg|kml|m4a|m4v|mid|midi|mkv|mov|mp3|mp4|mpa|mpeg|mpg|ogg|ogv|pages|pcx|pdf|png|pps|ppt|pptx|potx|ra|ram|rm|rtf|sit|sitx|tar|tgz|tif|tiff|txt|wav|webm|wma|wmv|xls|xlsx|xltx|zip|zipx)$ {
sendfile on;
try_files $uri /index.php?$query_string;
}
location ~ ^/assets/error-\d\d\d.html$ {
try_files $uri =404;
}
location ~ ^/assets/ {
return 404;
}
location /index.php {
fastcgi_buffer_size 32k;
fastcgi_busy_buffers_size 64k;
fastcgi_buffers 4 32k;
fastcgi_keep_conn on;
fastcgi_pass 127.0.0.1:9000;
fastcgi_index index.php;
fastcgi_param SCRIPT_FILENAME $realpath_root$fastcgi_script_name;
include fastcgi_params;
}
#SSL
listen [::]:443 ssl ipv6only=on; # managed by Certbot
listen 443 ssl; # managed by Certbot
ssl_certificate /etc/letsencrypt/live/domain.com/fullchain.pem; # managed by Certbot
ssl_certificate_key /etc/letsencrypt/live/domain.com/privkey.pem; # managed by Certbot
include /etc/letsencrypt/options-ssl-nginx.conf; # managed by Certbot
ssl_dhparam /etc/letsencrypt/ssl-dhparams.pem; # managed by Certbot
}
#SSL
server {
if ($host = www.domain.com) {
return 301 https://$host$request_uri;
} # managed by Certbot
if ($host = domain.com) {
return 301 https://$host$request_uri;
} # managed by Certbot
listen 80;
listen [::]:80;
server_name domain.com www.domain.com;
return 404; # managed by Certbot
}
- Activate your new .conf file, in my case i use ‘nginx_modsite’
- Reference (GitHub - ajsalkeld/nginx-modsite: A bash script to enable, disable and list Nginx sites on Linux.)
$ touch /usr/bin/nginx_modsite
$ chmod +x /usr/bin/nginx_modsite
$ nginx_modsite -d default
$ nginx_modsite -e domain.com
$ service nginx restart
-
Clone your project using git clone
-
Create database in mysql
$ mysql -u root -p
$ mysql > create database ‘db-name’;
$ exit
- Import SQL file for the database
$ mysql -u root -p ‘database-name’ < ‘file-name.sql’
- Modify .env file according to your settings with your own database credentials
- Change project permissions
$ sudo chown -R www-data:www-data /var/www/html
- Import timezones
$ mysql_tzinfo_to_sql /usr/share/zoneinfo | mysql -u root -p mysql
- Restart Nginx
$ service nginx restart
- Rebuild database and flush to clear cache using the command, add (/dev/build?flush=all) on base url
(/dev/build) is for rebuilding database (this will retain existing structured data)
(?flush=all) is for clearing the cache / refresh
- Like so : Http: ‘server-ip-address’/dev/build?flush=all
- Note: need to access the admin cms to execute the /dev/build command**
- Visit again the website to verify if its working now.
 , since im not too familiar on Nginx, i only come up on that solution and open on suggestion. I will note that
  and try it on my nxt project.